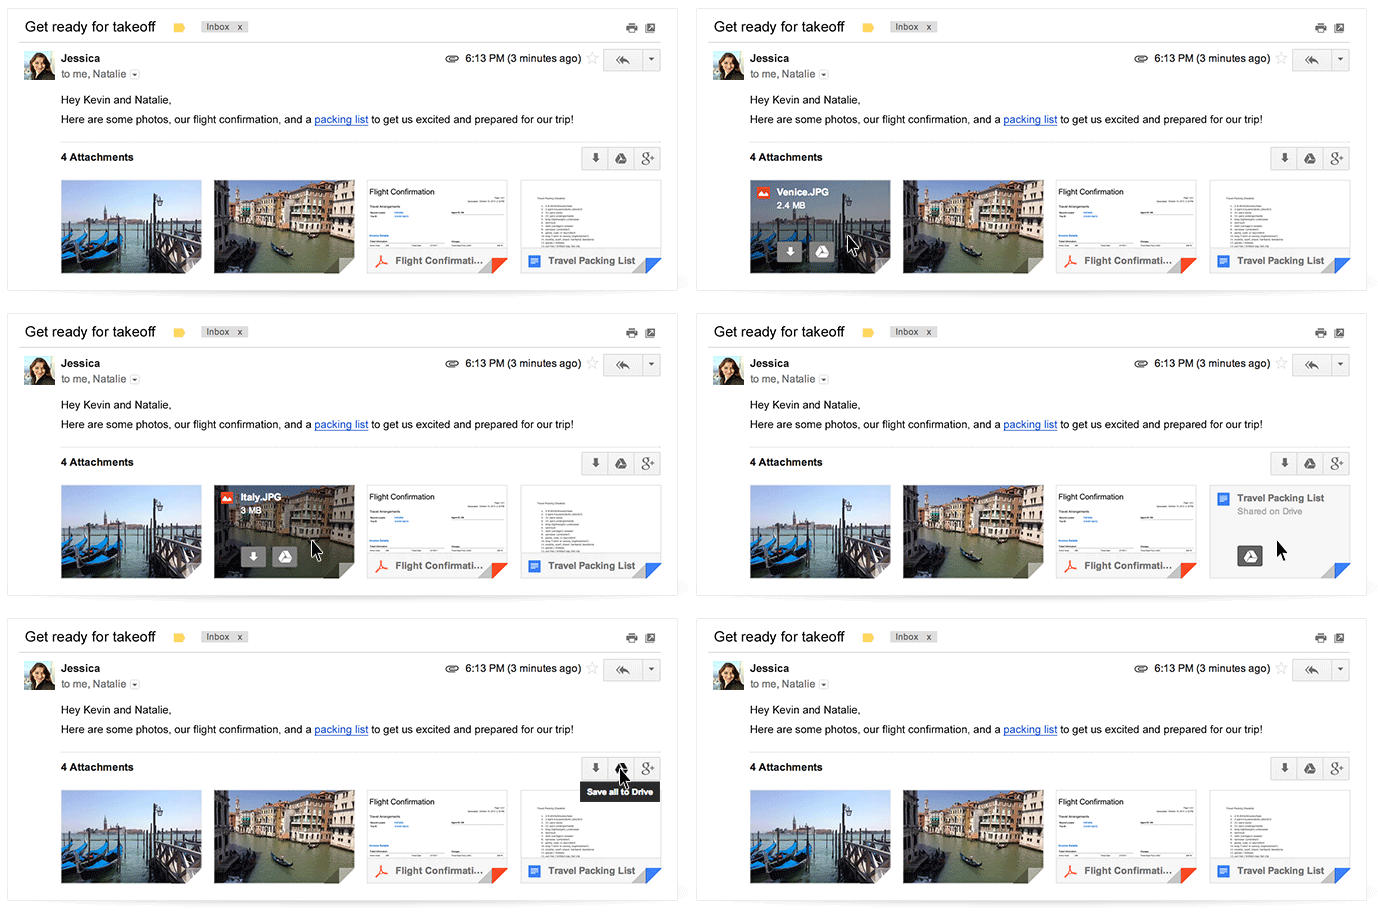
Starting today, many Gmail users will find a new way to view, download, and save attachments. You can see the details here. I quickly realized that this new functionality made it a lot easier to save an email attachment in your Google Drive. I also realized that every new file in Drive takes up space. Clearly, their intentions are two-fold: 1) make it easier for you to use attachments within their systems, and 2) suck up your free space faster so that you have to upgrade to paid storage.
These thoughts inspired me to share with you about how to reduce space usage among all of your Google Products.
How do I save space in my Gmail account? How do I find emails with big attachments? Search and destroy! Click this link to see your emails that have attachments larger than 10 Megabytes, the delete what you don’t need. Modify the results by changing “10MB” on the end of the search string to another number like “5MB” or “20MB” — https://mail.google.com/mail/u/0/?shva=1#search/has%3Aattachment+larger_than%3A10MB
Gmail is a truly fantastic email client for all devices. And for years they have promoted the fact that “You’ll never have to delete another email again.” And that’s good, too, because often you find yourself searching for that one very important, legally-binding message from two years ago!

Also true is that you may send and receive some emails that do not need such a long shelf life. For example, I might send a 15MB print proof to a client. Once they have approved the job, I’ve printed the job, delivered the product to the client, AND (most importantly) the client is thrilled, I really don’t need to keep that message / attachment. Delete.
So while I really don’t have to delete that message, it’s not entirely necessary to hang on to it. But some messages sneak through the business of the day, and the link above helps to find them quickly.
It used to be that Google gave you separate space for each of their products you used. But today, Google has given its users combined space so that your Gmail Storage + Photos (Picasa / GooglePlus) + Google Drive = Your Total Storage Allocation. Think of it as one big bucket of space for all of your Google stuff.
In my case, I pay an annual fee for a grandfathered plan. (It’s no longer available for purchase.) I pay something like $5 per year for 36-Gig combined. The new packages that are available to users today are much more costly than free. The smallest package is $60/yr for 100GB, and the largest is $9600/yr for 16 Terrabytes.
So if you’re using up a lot of your space, you might want to slim down before you have to jump to a paid package.
As mentioned, other items that take up your allocation are Google Photos and Google Drive items that are not Drive-flavored documents like Google Docs, Sheets & Presentations.

How do I save space and delete big files in my Google Drive account?
- Click on My Drive (on the left side)
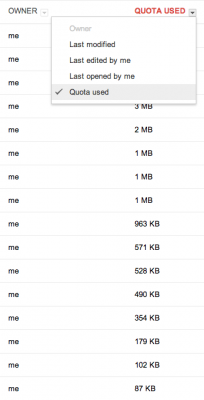
- Look to the right find the “Last Modified” column. Click the column header drop-down and change it to “Quota Used”
- Look at the biggest files and decide whether you still need some of those big guys.
How do I delete big photo files from Google Picasa and / or Google+ Photos?
Well, unfortunately, there’s no easy way to do this yet. Google does not provide a sort or search tool. One blogger suggests downloading ALL of your photos, sorting them with your desktop file manager, delete some you don’t need, and re-size others…. then re-upload everything. To me, that’s a giant pain in the butt. I guess it’s something you do if the timing is critical and you absolutely MUST cut down, right now, on space used.
My best solution for the time being is to simply change your ways moving forward, at least until there’s a better way to sort / delete within the Google Photos viewer. Moving forward, remember to import your photo files to Google+ Photos by FIRST adding them through Google Drive.
- In Google Drive create a folder called “Photos”
- Upload your photo files to this folder
- In Google+ Settings, checkmark the option to display photos that are in Google Drive
This way, you can use all of the great photo features that are part of Google+ Photos. AND you can use the “Quota Used” trick in Google Drive to sort and delete what’s cramping your style.
The one downside is that if you have Instant Upload / Auto Backup turned on in your phone settings, you may wind up having two duplicate images viewable in G+ Photos. Why is that?
- You take a picture with your phone.
- The phone auto-uploads your photo to Google Photos.*
- You connect your phone to your computer and upload image files to your Google Drive Photos Folder.
- Google Photos displays your original phone’s auto-upload AND the same image file that’s in your Drive Folder.
*Check your Google Photos settings on your phone and decide whether you want Auto Backup to save the file at original resolution, OR if you want it to save a screen-resolution image. The screen size files are free storage. The full-size images are not free, and that, my friends, takes up space.
Happy storing!


You must be logged in to post a comment.